RMT Process: Difference between revisions
From Guide to YKHC Medical Practices
No edit summary |
No edit summary |
||
| (One intermediate revision by the same user not shown) | |||
| Line 1: | Line 1: | ||
Also see '''[https://wiki.cerner.com/display/YUKOAK/How+To+Do+RMT Learning Live – How To Do RMT]''' | |||
# Go to Message Center | # Go to Message Center | ||
# Go to Proxies tab on upper left– hit arrow – Select the appropriate RMT box: Yukon/Kusko/Emergency/CPP/Optometry/Dental | # Go to Proxies tab on upper left– hit arrow – Select the appropriate RMT box: Yukon/Kusko/Emergency/CPP/Optometry/Dental | ||
| Line 16: | Line 18: | ||
#*:[[file:rmtravenpic.jpg]] | #*:[[file:rmtravenpic.jpg]] | ||
# Close the patient’s chart; MESSAGE CENTER should automatically become visible with the RMT document you were working on. | # Close the patient’s chart; MESSAGE CENTER should automatically become visible with the RMT document you were working on. | ||
# Modify the note by adding an addendum – right click within the body of the RMT document and choose modify or click the icon at the top that looks like an eraser over a piece of notebook paper | # Modify the note by adding an addendum – right click within the body of the RMT document and choose "modify" or click the icon at the top that looks like an eraser over a piece of notebook paper | ||
#:[[file:Modify_button.jpg]] | |||
# A blinking cursor will appear in the area for you to add the addendum at the bottom of the RMT document. | # A blinking cursor will appear in the area for you to add the addendum at the bottom of the RMT document. | ||
# Type in your comments and click ‘Sign.’ | # Type in your comments and click ‘Sign.’ | ||
Latest revision as of 12:02, 2 December 2020
Also see Learning Live – How To Do RMT
- Go to Message Center
- Go to Proxies tab on upper left– hit arrow – Select the appropriate RMT box: Yukon/Kusko/Emergency/CPP/Optometry/Dental
- Select first document in the list appearing on the Right side and open it by double clicking.
- If you open an RMT, but are unable to complete it, right click it and select “Mark Unread”
- Read RMT- pay particular attention to “Note to RMT:,” “Are you Up-To-Date With Your Immunizations:,” “Telemed:,” vitals, and “Health Aide Comments.”
- Review Patient Chart: Locate patient’s name in right upper corner and select the downward arrow, then click “Workflow Views.” If “Assign a Relationship” box pops-up, choose “RMT Provider” and click ‘OK’
- Review recent Documentation, lab results, and immunization history
- For Pediatric Patients, review the Growth Curve
- Review Orders:
- Scroll on the Order’s View box (lite blue box on the left side) to see the “Village Clinic…” powerplans located near the top.
- Review the Village Powerplan orders selected in the window to the right.
- If no orders added, just close the chart.
- If you check additional order boxes, click “Orders for Signature” at the bottom right (NOT “INITIATE NOW”) and then “sign”
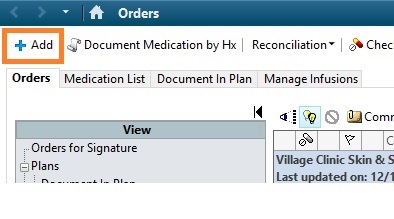
- For orders not on the power plans, select ADD to PHASE. Then hit “Orders for Signature” (NOT INITIATE NOW)
- If a patient needs a medication to be sent from Bethel pharmacy (not available from the village formulary) – Order it from the blue Plus from the left side of the screen and select "mail to" when ordering it. New meds can be written on either form.
- Close the patient’s chart; MESSAGE CENTER should automatically become visible with the RMT document you were working on.
- Modify the note by adding an addendum – right click within the body of the RMT document and choose "modify" or click the icon at the top that looks like an eraser over a piece of notebook paper
- A blinking cursor will appear in the area for you to add the addendum at the bottom of the RMT document.
- Type in your comments and click ‘Sign.’
- At the bottom of RMT document Hit ‘Additional Forward Action’ box –
- Click the down arrow of the dropdown box and select “Review”
- In the To: field –
- Type the first few letters of the last name, then the first name of the Health aide who sent the RMT document to you and click ‘Enter’ (The Health Aides name should populate the field. If there are multiple options or you misspell the name, and “Address Book” box will pop-up to search current staff
- (delete previous RMT health aide’s name).
- Finally, Click ‘OK and Close’ – (DO NOT HIT NEXT)
